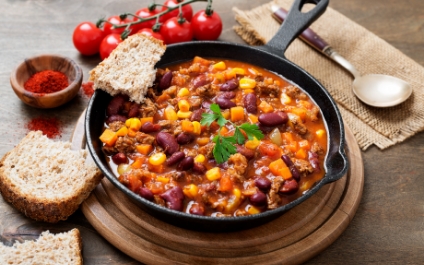
Chili is filling enough to stand-alone as a full meal itself, but you can always add sides or even use chili as a "topping" for other foods. Try serving it with cornbread, coleslaw, or grilled corn.
We love to use chili as a topping over rice, baked potatoes, nachos, and even as a filling for tacos. Let your heart (and stomach) decide how you want to enjoy your chili because the possibilities are endless.
Ingredients
4 tablespoons olive oil
1 yellow onion, chopped
1 red bell pepper, chopped
1 Chili pepper, chopped
2 red jalapeno pepper, chopped
4 garlic cloves, minced
2 ½ pounds lean ground beef
¼ cup Worcestershire sauce
1 pinch garlic powder, or to taste
2 beef bouillon cubes
1 (12 fluid ounce) can or bottle light beer (such as Coors)
1 (28 ounce) can crushed tomatoes
1 (14.5 ounce) can fire-roasted diced tomatoes
1 (12 ounce) can tomato paste
½ cup white wine
2 tablespoons chili powder
2 tablespoons ground cumin
1 tablespoon brown sugar
1 tablespoon chipotle pepper sauce
2 ½ teaspoons dried basil
1 ½ teaspoons smoked paprika
1 teaspoon salt
½ teaspoon dried oregano
½ teaspoon ground black pepper
2 (16 ounce) cans dark red kidney beans (such as Bush's)
1 cup sour cream
3 tablespoons chopped fresh cilantro
½ teaspoon ground cumin
Instructions Checklist
Step 1
Heat oil in a large pot over medium heat; cook and stir onion, bell pepper, Anaheim pepper, jalapeno peppers, and garlic in the hot oil until softened.
Step 2
Meanwhile, heat a large skillet over medium-high heat. Cook and stir beef in the hot skillet until browned and crumbly, 5 to 7 minutes; add Worcestershire sauce and garlic powder. Crumble bouillon cubes over beef and add beer. Continue to cook , scraping any browned bits from the bottom of the skillet, until liquid is hot, about 3 minutes. Stir beef mixture into pepper mixture.
Step 3
Stir crushed tomatoes, diced tomatoes, tomato paste, and wine to the beef mixture. Season with chili powder, 2 tablespoons cumin, brown sugar, pepper sauce, basil, paprika, salt, oregano, and black pepper. Bring to a boil and reduce heat to medium-low. Cover and simmer until meat and vegetables are very tender and flavors have developed in the chili, about 90 minutes, stirring occasionally.
Step 4
Mix kidney beans into beef and vegetables. Continue to simmer until beans are hot, about 30 minutes more.
Step 5
Blend sour cream, cilantro, and remaining 1/2 teaspoon cumin in a food processor until smooth. Serve sour cream mixture with chili.
How to Make Chili
You'll find the full, detailed recipe below, but here's what you can expect when making this chili:
Sauté the Vegetables
In a large pot, sauté the onion, bell pepper, Anaheim pepper, jalapeños, and garlic until softened.
Brown the Ground Beef
Brown the ground beef, then season it with Worcestershire sauce, garlic powder, bouillon, and beer. Once combined, add the beef mixture to the vegetable mixture.
Add the Tomato Products and Seasonings
Stir crushed tomatoes, diced tomatoes, tomato paste, wine, and seasonings into the beef and vegetable mixture.
Simmer
Bring the mixture to a boil, then simmer until the flavors have blended together, about 90 minutes. Add in kidney beans, then simmer for another 30 minutes, until the beans are hot.
Make the Crema
In a blender, combine sour cream, cilantro, and cumin to create a crema. Serve the chili topped with crema and any other toppings you like.
How to Thicken Chili
This chili should already be your preferred level of thickness, thanks to all the thickening agents in it. But if you're having trouble reaching your desired consistency, there are multiple ways to thicken chili.
The easiest way is to simply simmer it for longer. The longer it simmers, the more liquid will evaporate.
But, if you don't have time to simmer your chili for hours, you can thicken it with cornmeal, cornstarch, or all-purpose flour. Add 1 tablespoon of cornmeal directly to the pot and allow it to simmer for about 10 more minutes to thicken up. Or add a cornstarch or flour slurry — this means 1 tablespoon of water mixed with 1 tablespoon of cornstarch or 2 tablespoons of water mixed with 1 tablespoon of flour. If you add flour or cornstarch directly to the chili, it will clump. Instead, gradually whisk in the slurry then simmer for 10 minutes.
Another option is to add more starchy ingredients, like vegetables or beans. These will absorb some of the liquids and thicken the chili. Plus, you'll have more hearty and delicious ingredients to enjoy.
How to Thicken Chili
This chili should already be your preferred level of thickness, thanks to all the thickening agents in it. But if you're having trouble reaching your desired consistency, there are multiple ways to thicken chili. The easiest way is to simply simmer it for longer. The longer it simmers, the more liquid will evaporate. But, if you don't have time to simmer your chili for hours, you can thicken it with cornmeal, cornstarch, or all-purpose flour. Add 1 tablespoon of cornmeal directly to the pot and allow it to simmer for about 10 more minutes to thicken up. Or add a cornstarch or flour slurry — this means 1 tablespoon of water mixed with 1 tablespoon of cornstarch or 2 tablespoons of water mixed with 1 tablespoon of flour. If you add flour or cornstarch directly to the chili, it will clump. Instead, gradually whisk in the slurry then simmer for 10 minutes. Another option is to add more starchy ingredients, like vegetables or beans. These will absorb some of the liquids and thicken the chili. Plus, you'll have more hearty and delicious ingredients to enjoy.
How to Store Chili
Package completely-cooled chili into an airtight container and store it in the refrigerator for up to four days.
How to Freeze Chili
If you want your chili to last longer, you should freeze it. Ladle completely cooled individual servings of chili into zip-top freezer bags (make sure to squeeze out the excess air). Label and date the bags, and store them in the freezer for up to three months. When you're ready to eat it, thaw it overnight in the fridge and reheat on the stove or in the microwave.
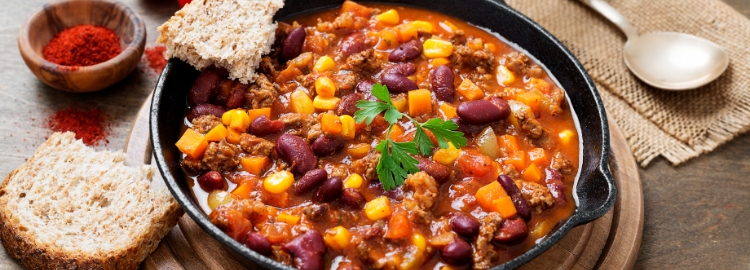 Chili is filling enough to stand-alone as a full meal itself, but you can always add sides or even use chili as a "topping" for other foods. Try serving it with cornbread, coleslaw, or grilled corn.
We love to use chili as a topping over rice, baked potatoes, nachos, and even as a filling for tacos. Let your heart (and stomach) decide how you want to enjoy your chili because the possibilities are endless.
Chili is filling enough to stand-alone as a full meal itself, but you can always add sides or even use chili as a "topping" for other foods. Try serving it with cornbread, coleslaw, or grilled corn.
We love to use chili as a topping over rice, baked potatoes, nachos, and even as a filling for tacos. Let your heart (and stomach) decide how you want to enjoy your chili because the possibilities are endless.
Leave a comment!